
XLKitLearn works on Excel for Windows, Mac, and Excel Online. The easiest way to get started with XLKitLearn is to install it directly from Microsoft AppSource.
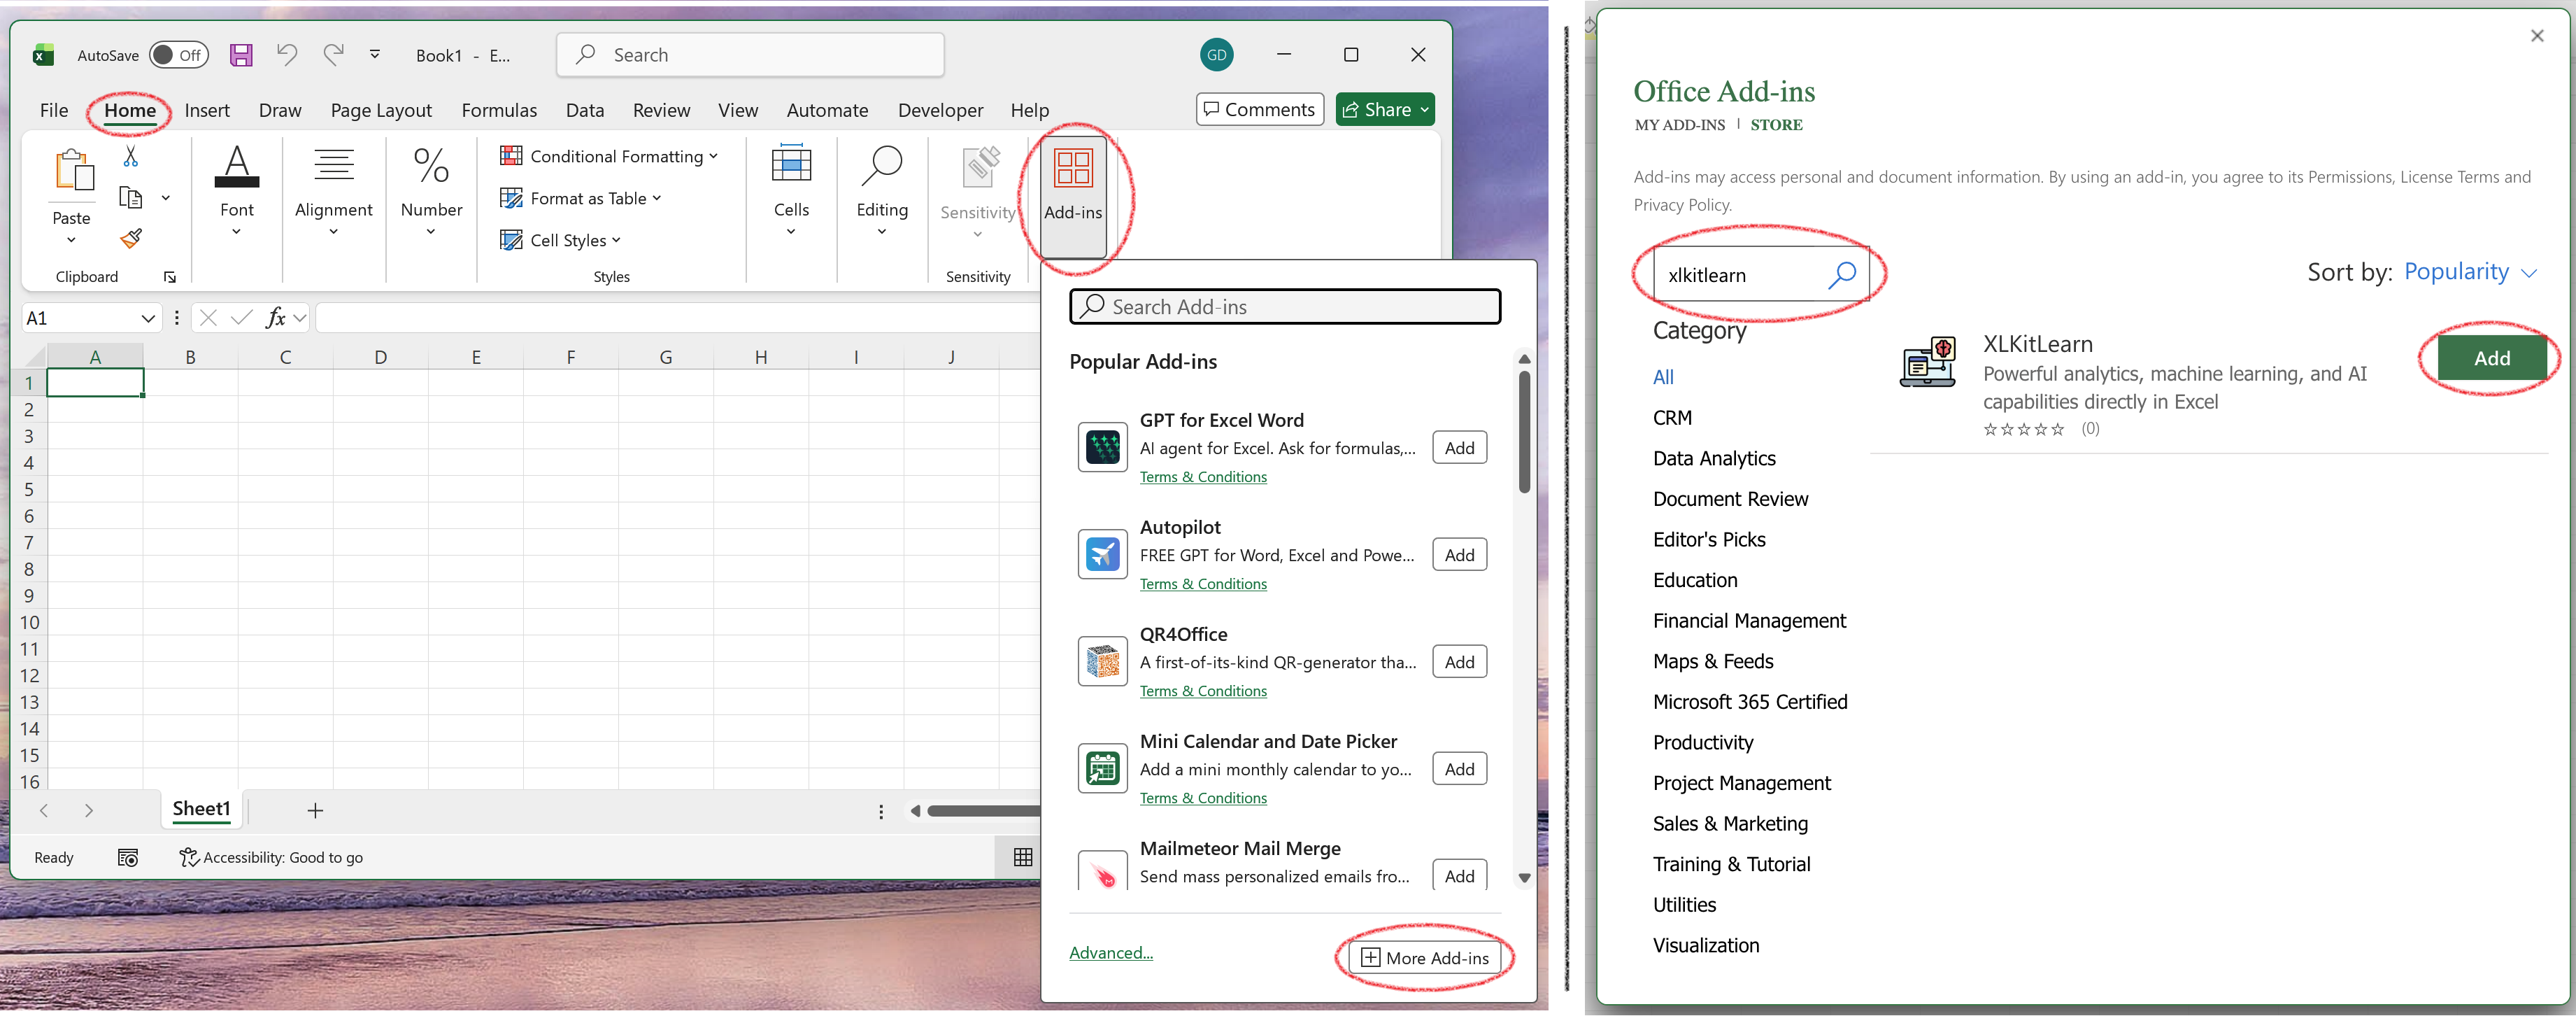
- In the "Home" tab on Excel, click on "Add-ins" and select "More add-ins" (try this even if it says "your organization has blocked access to the store" - it sometimes still works!)
- In the resulting window, search for XLKitLearn, and click "Add".
(Note: the exact steps might look slightly different depending on the version of Excel you're using, but they all start with clicking on "Add-ins" in the ribbon, and finding XLKitLearn there).
You should then see XLKitLearn appear in the "Home" tab of your ribbon. Click on it. If the XLKitLearn pane opens up as in the screenshot below, you're done!
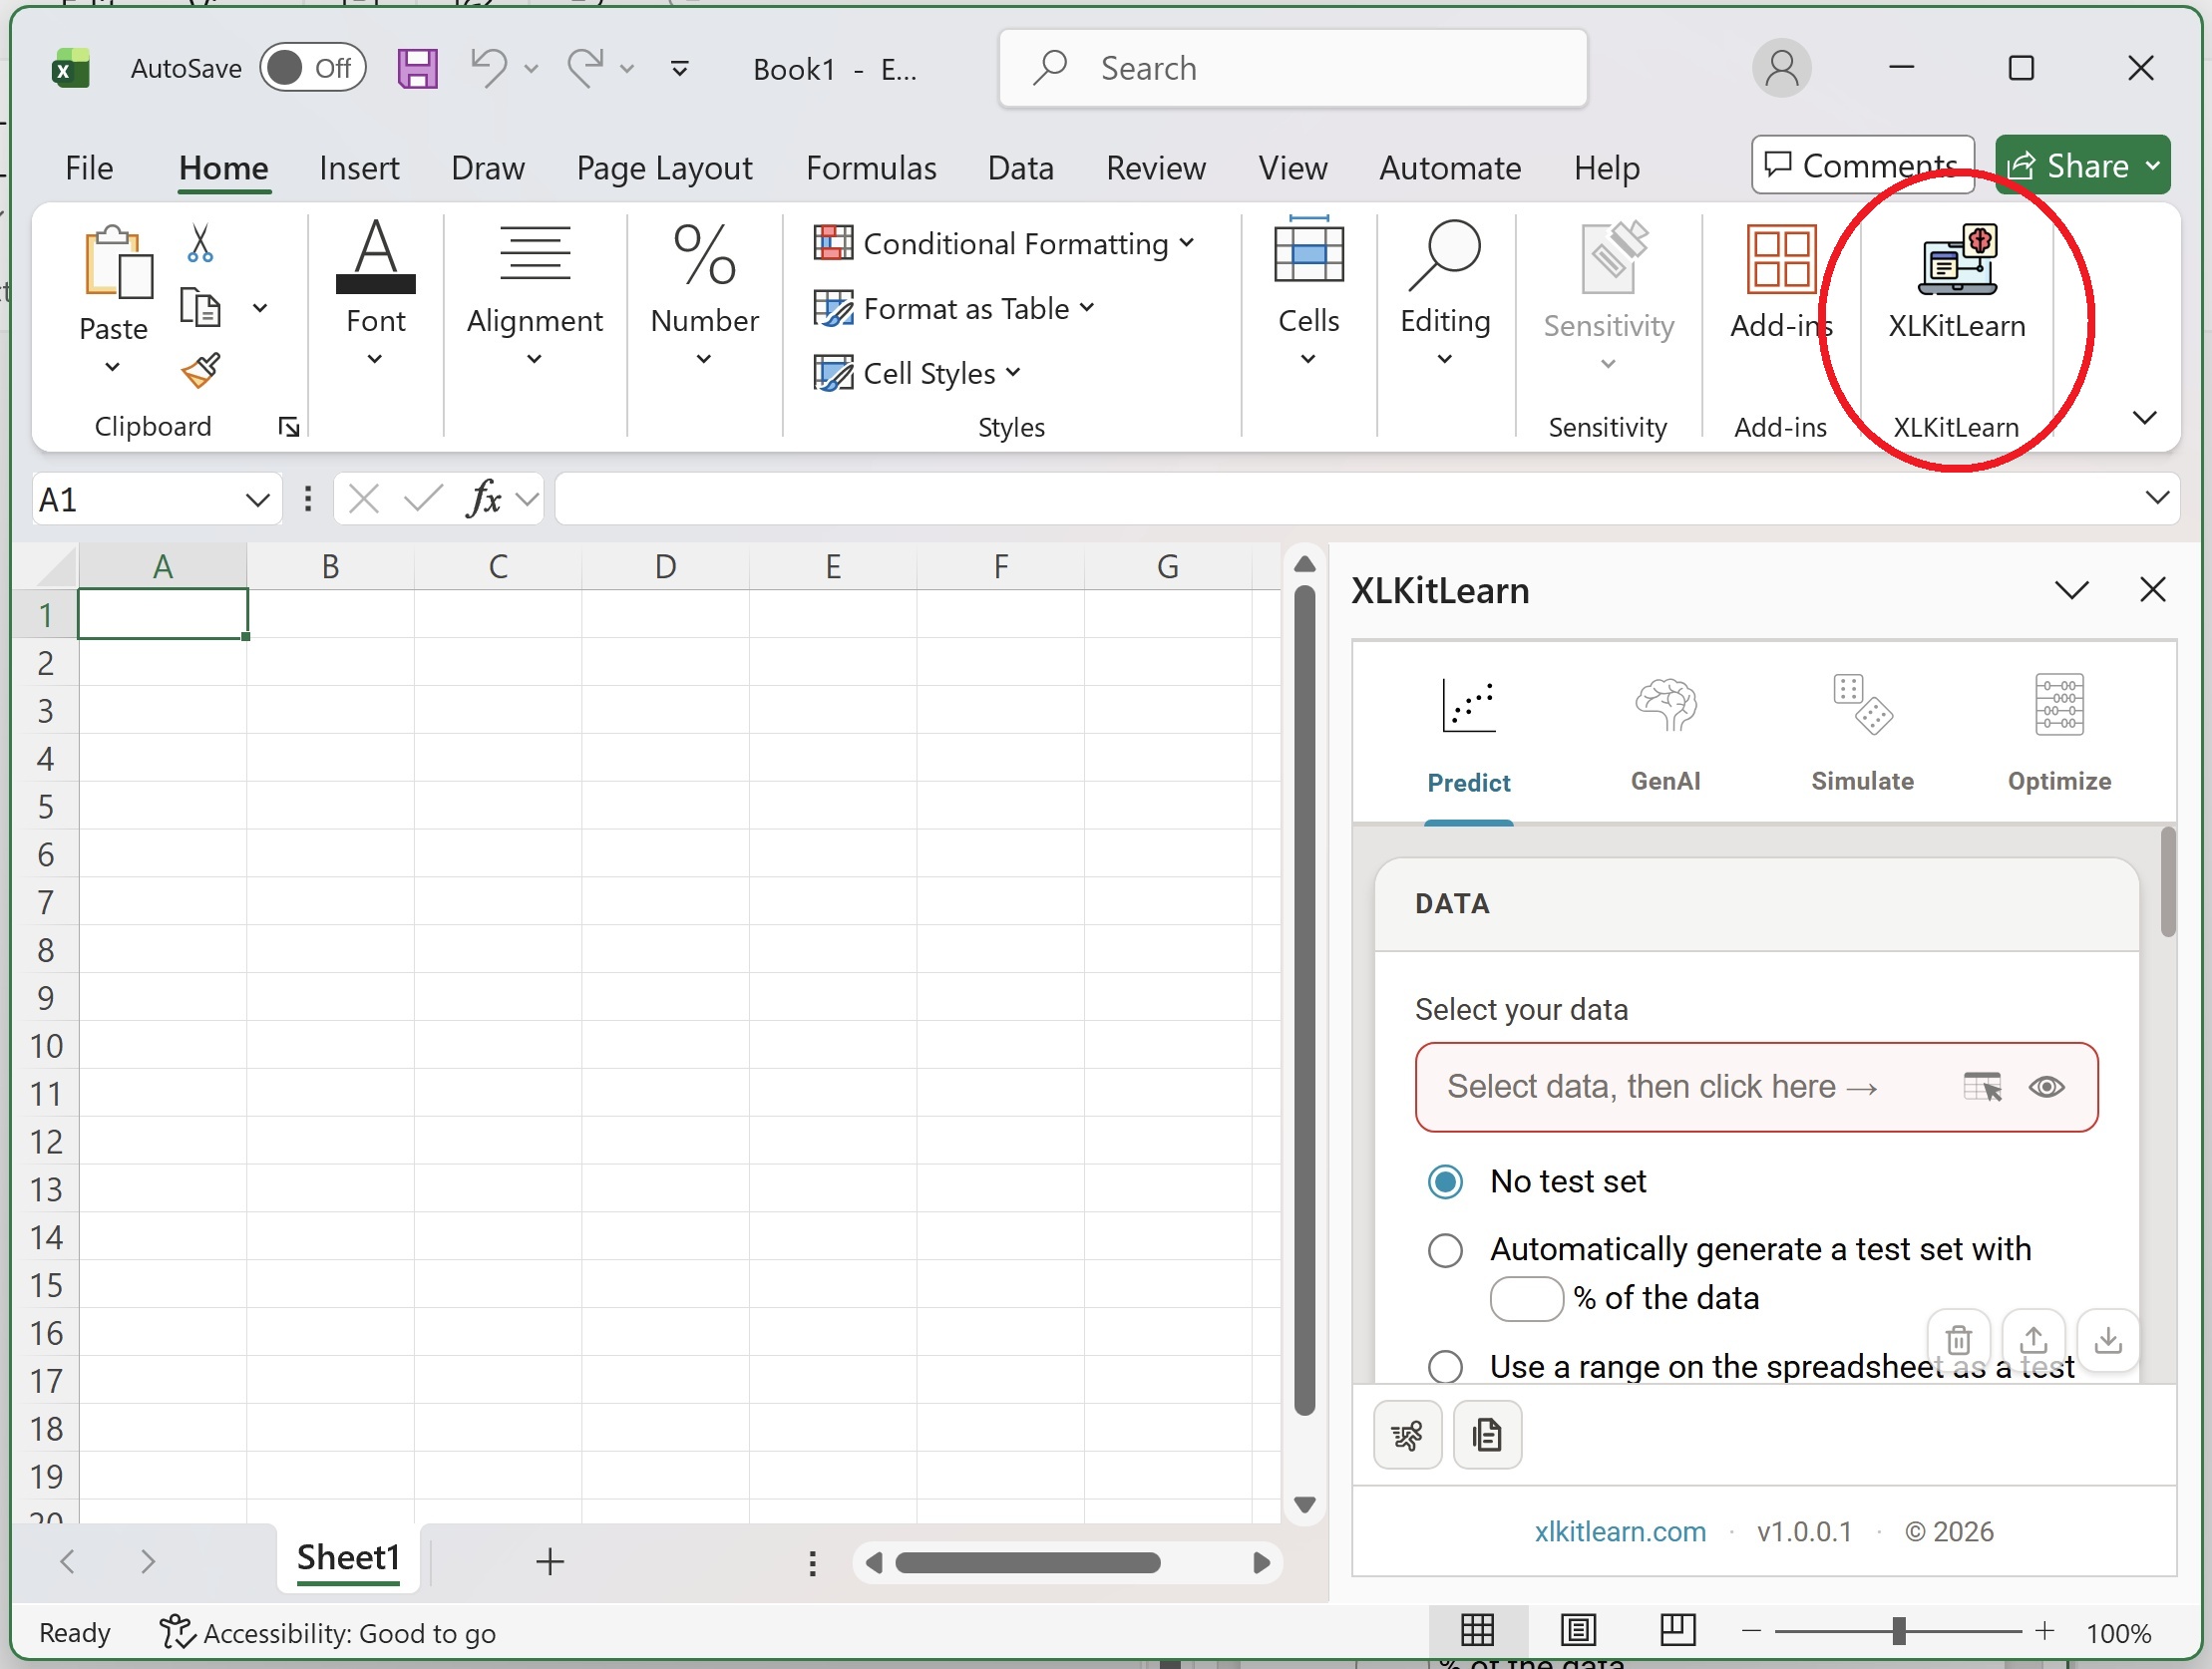
Excel for Windows
If the AppSource route above didn't work, follow these instructions to install XLKitLearn on Excel for Windows.
- Ensure Excel is closed.
- Click on the button below to download XLKitLearn's installation file, and run it Download installation file
-
Once the file has run, open Excel again. In the "Home" tab of the Excel ribbon, click on "Add-ins". At the bottom, click on "Advanced". In the window that pops up, click on "XLKitLearn" and click on "Add"
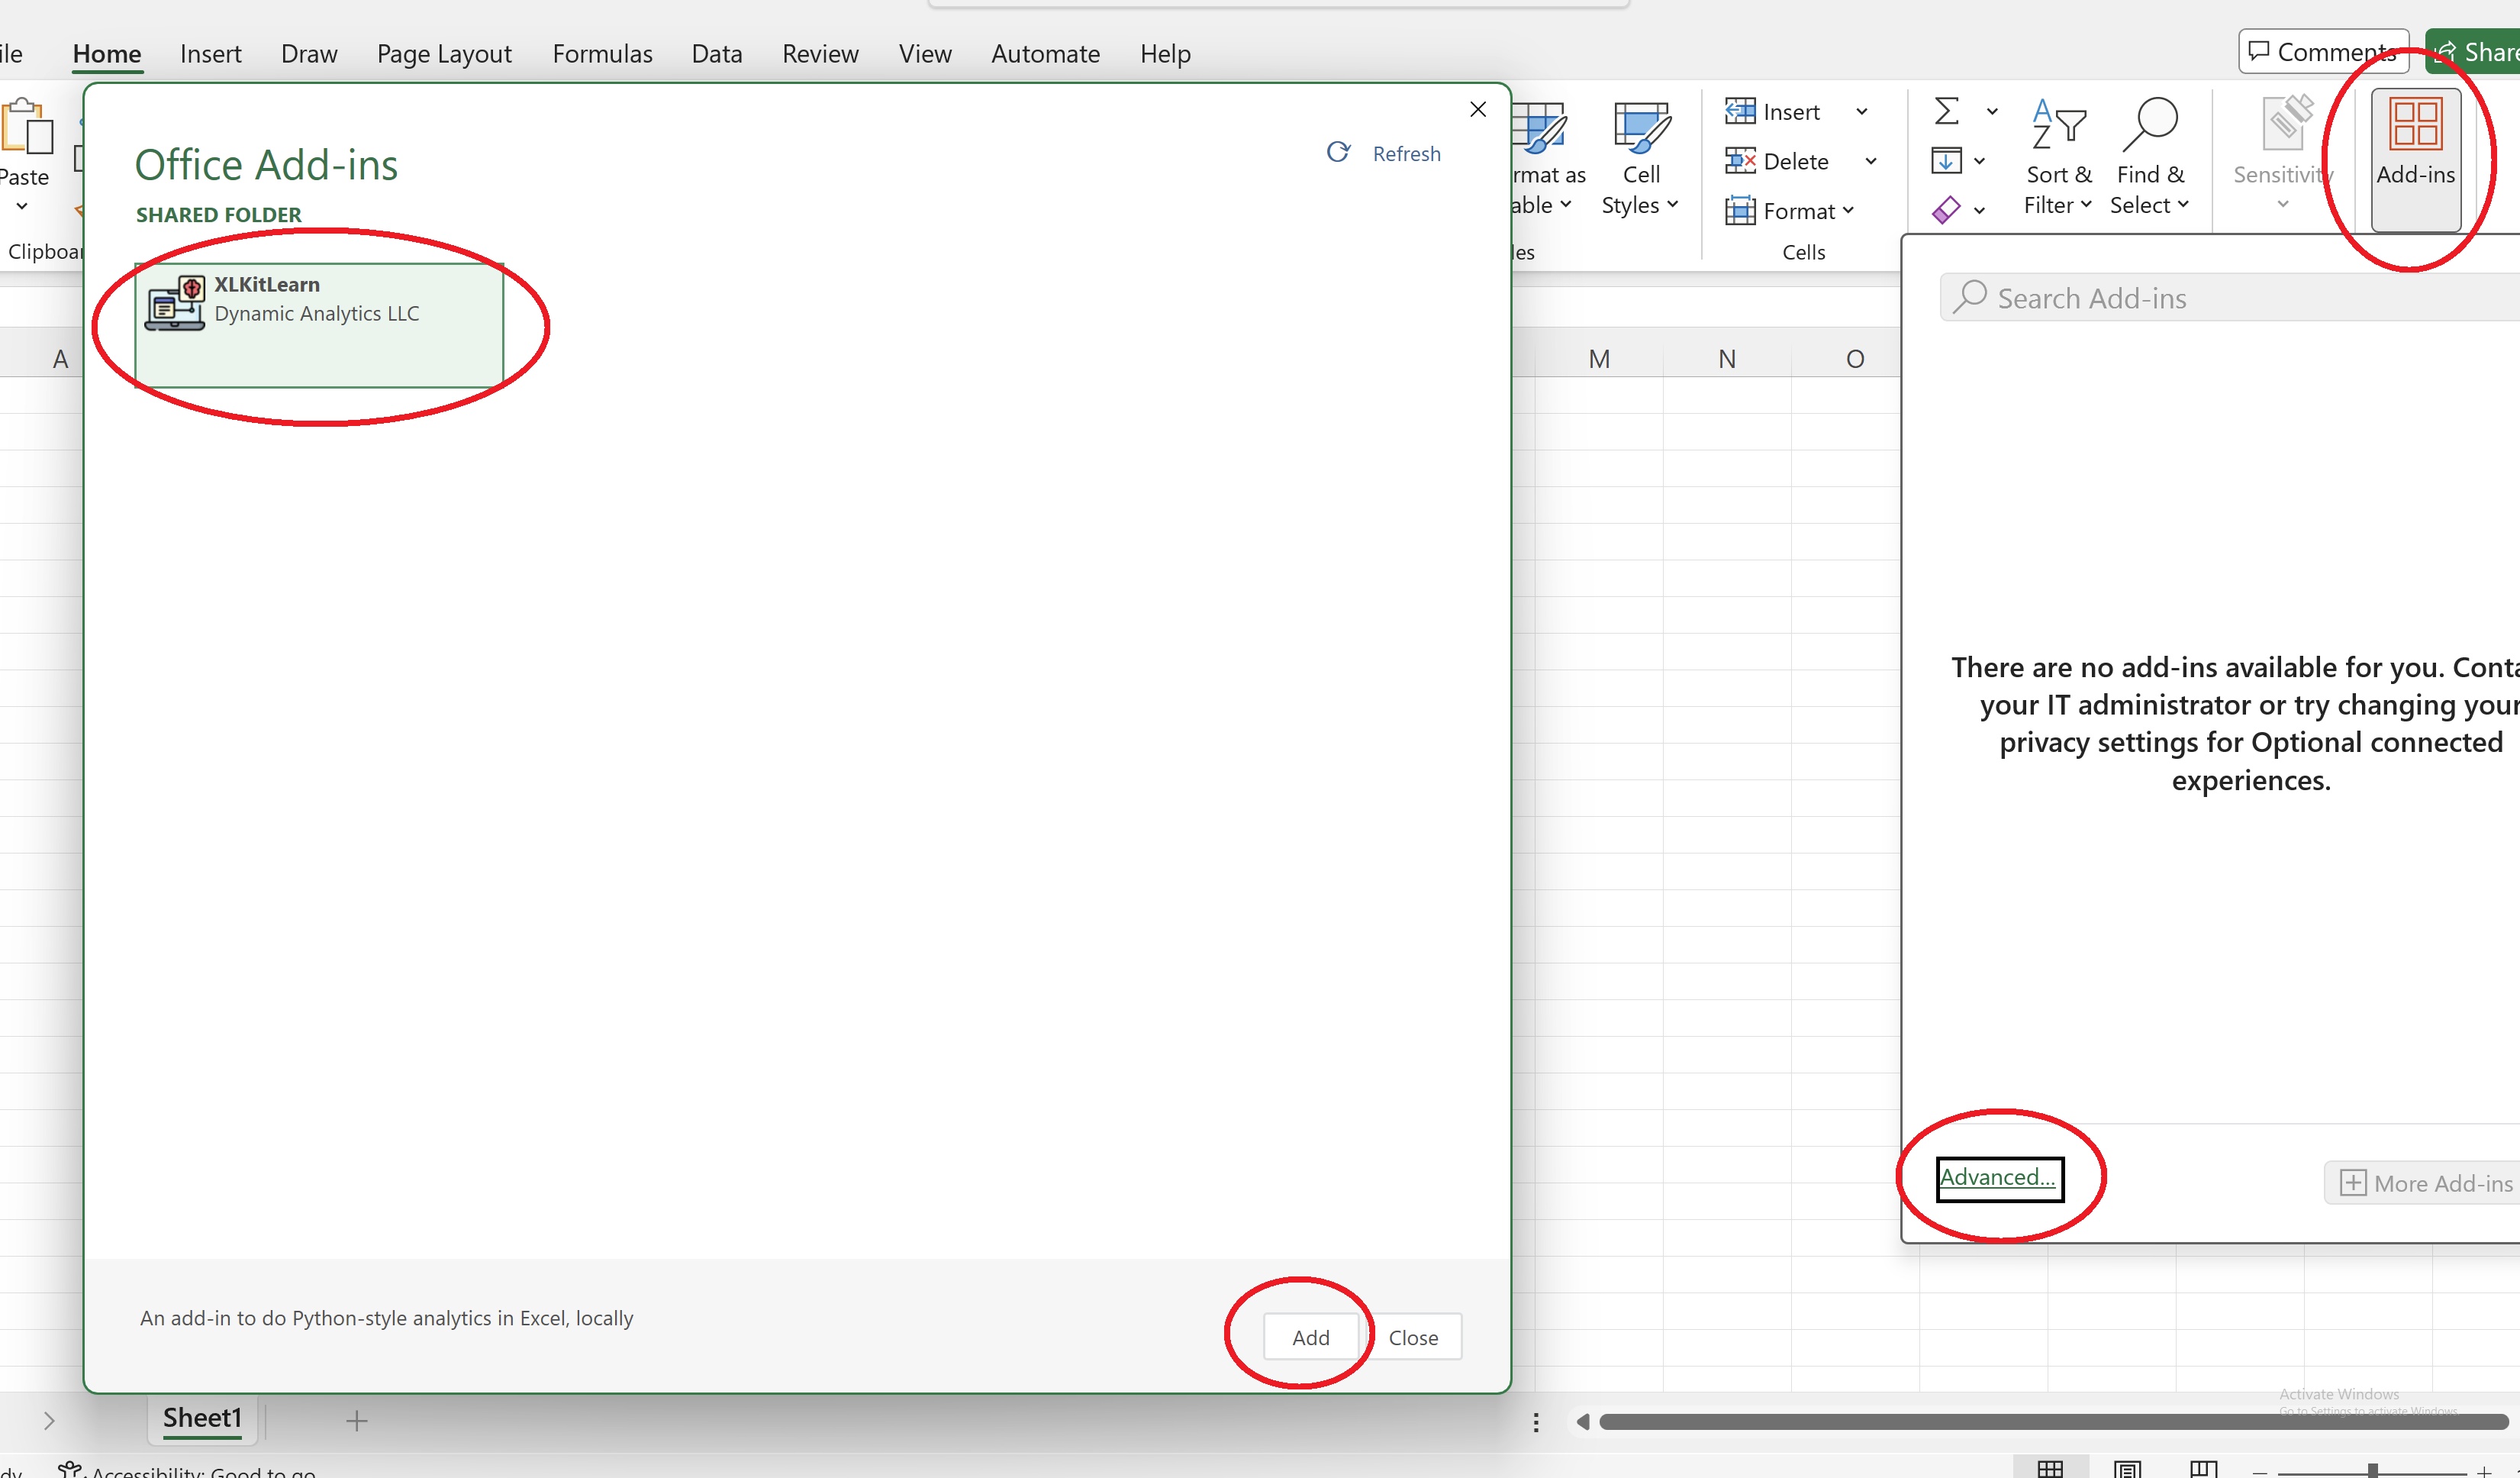
-
The XLKitLearn icon should appear on the "Home" tab in the ribbon. Click on it. If the XLKitLearn pane opens up as in the screenshot below, you're done! If not, read on...
- If the main installation file didn't work, click on the button below to download XLKitLearn's alternative installation file - save it in a folder by itself; there should be nothing else in that folder. Download alternative installation file
-
Right-click on the folder in which you saved the installation file (not the file itself) and click "Properties". Go to the "Sharing" tab, and click "Share..."
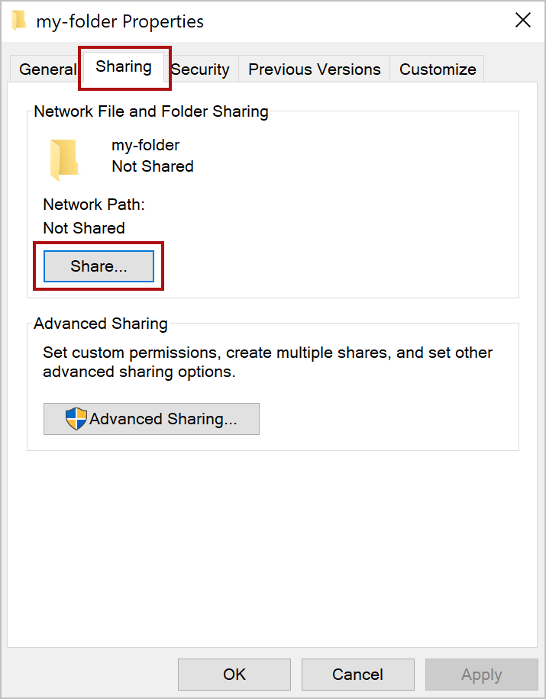
- In the resulting dialogue, select your username, and click "Share".
-
You will see the following dialogue. Write down the full network path displayed (
\\KBRANDL-2017\my-folderin the example below, highlighted in red).
Click "Done", and then "Close" to close the properties dialog.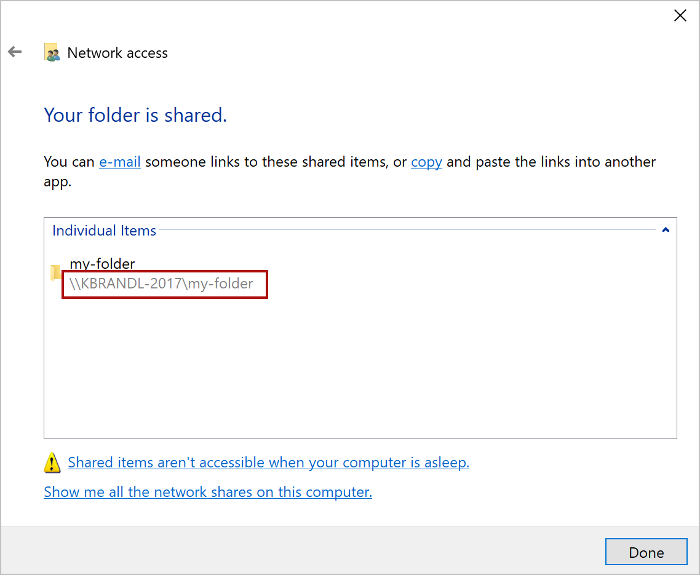
-
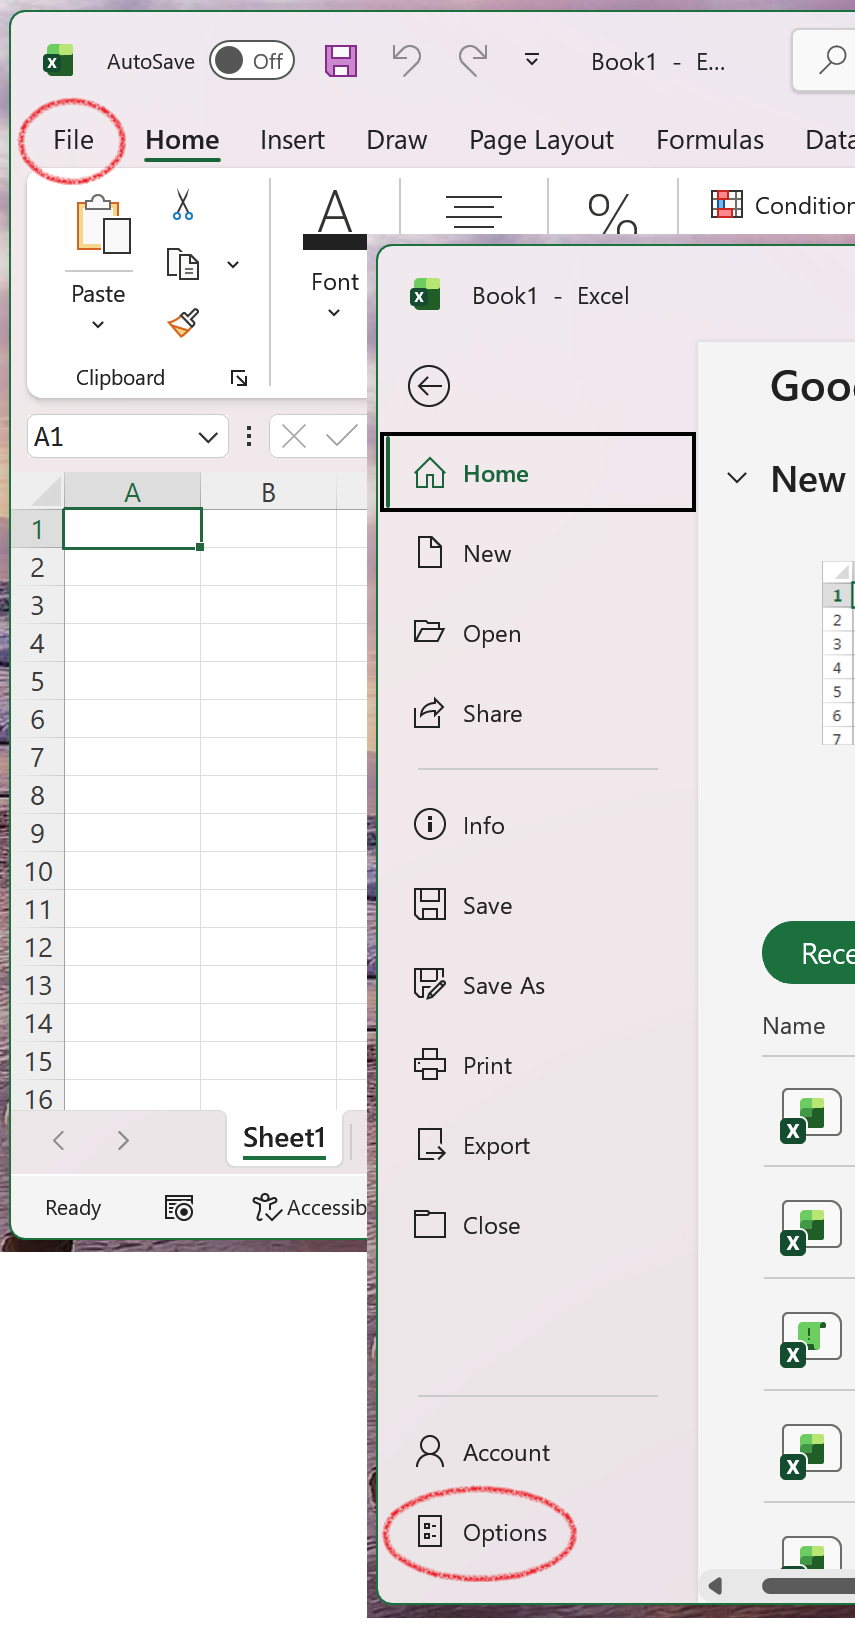
Open Excel. Go to the "File" tab, and click "Options"
-
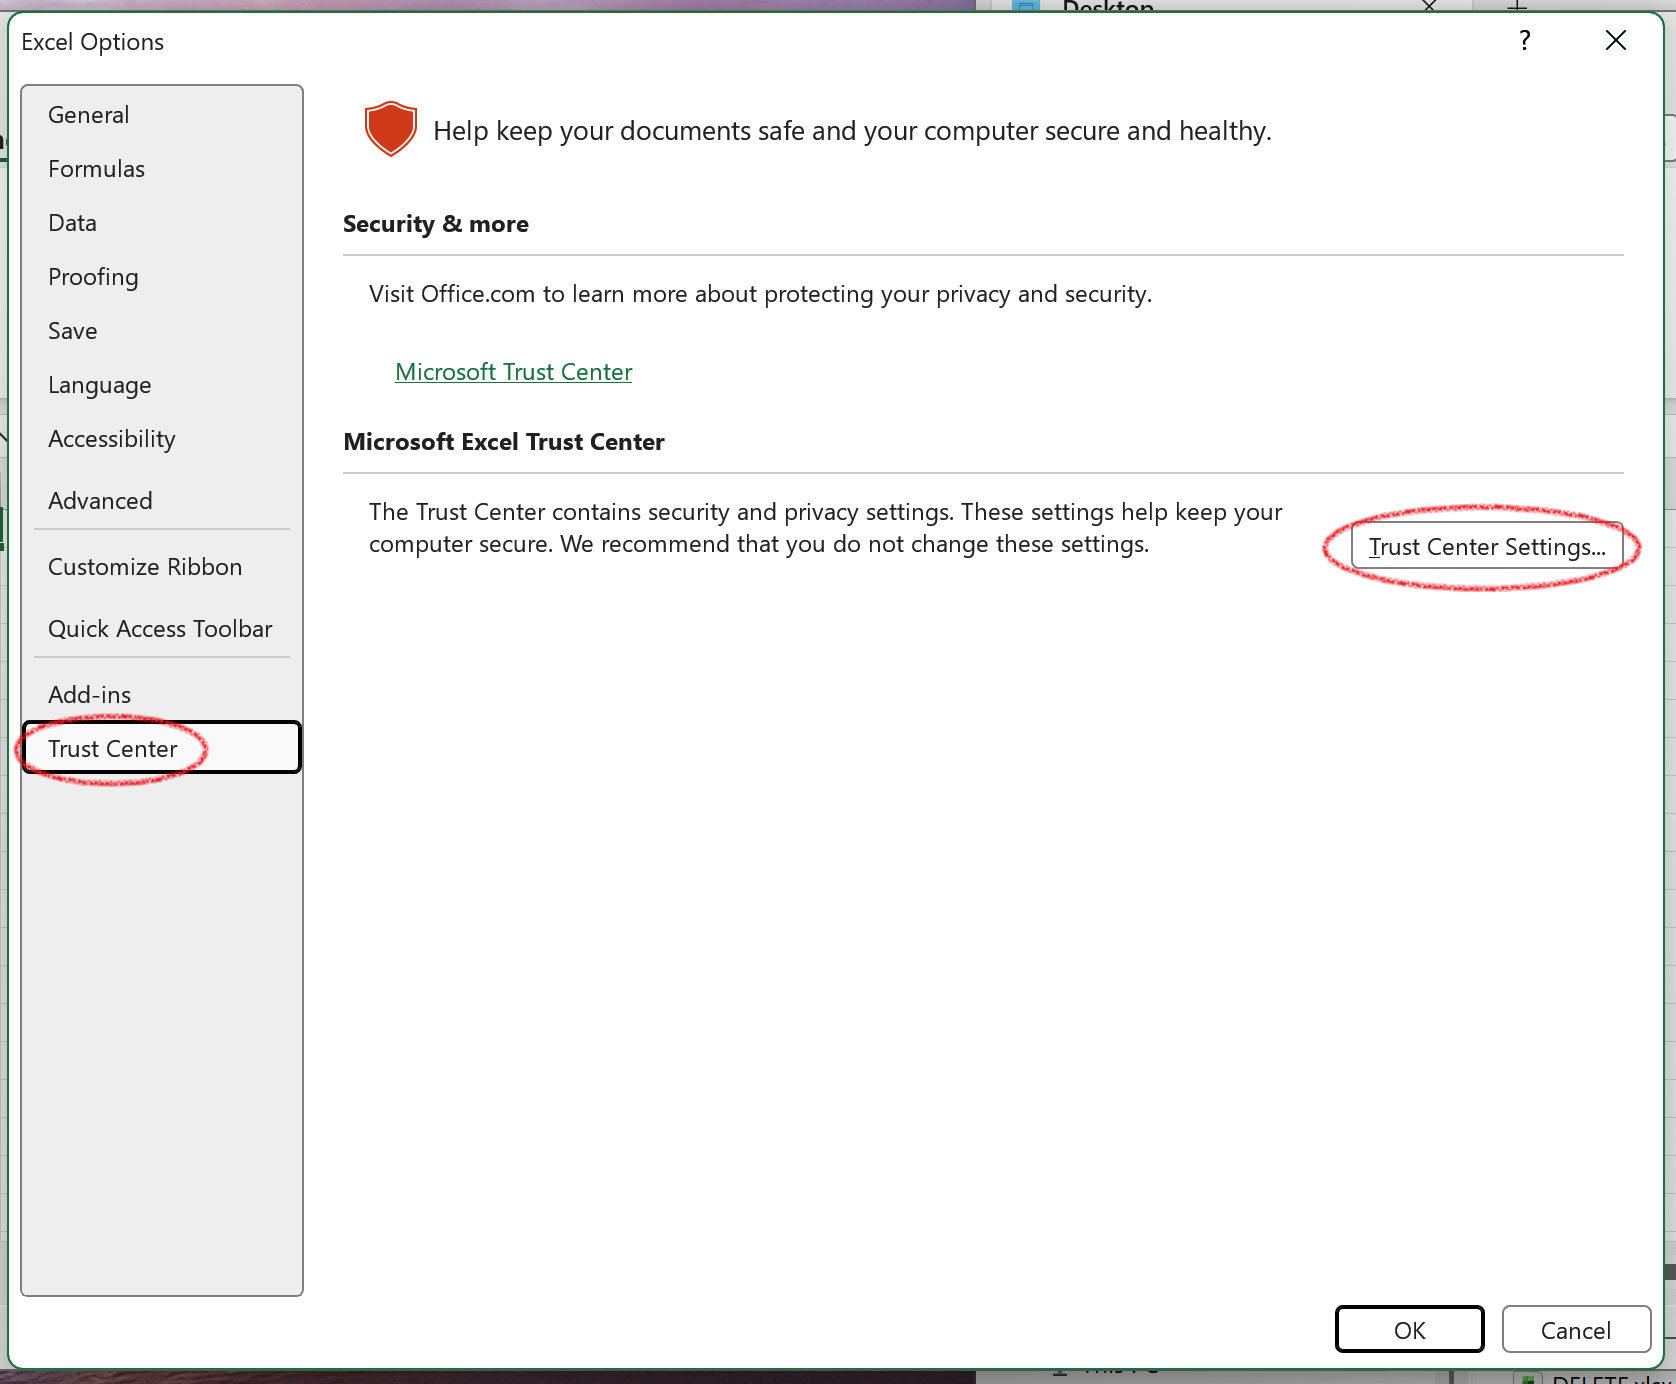
In the bar on the left, click on "Trust Center", and then click on "Trust Center Settings"
-
In the resulting window, click on "Trusted Add-in Catalogs" on the left. Under "Catalog URL", enter the full network path you wrote down above (in our example, it was
\\KBRANDL-2017\my-folder) and click on "Add Catalog". Make sure the "Show in menu" checkbox is selected.
Click OK.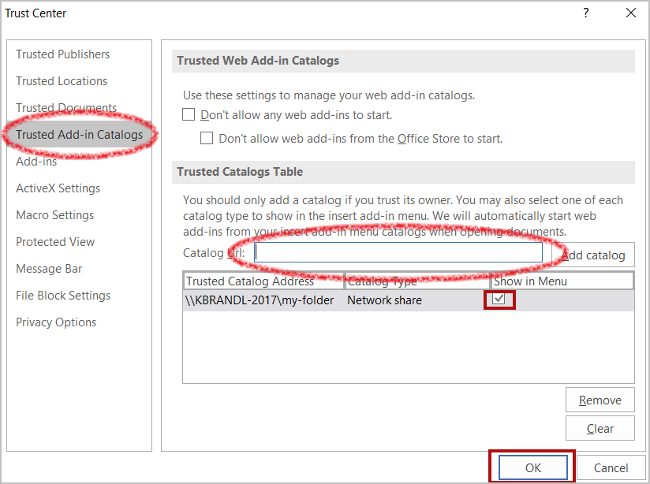
-
Close Excel, and re-open it. In the "Home" tab of the Excel ribbon, click on "Add-ins". At the bottom, click on "Advanced". In the window that pops up, click on "XLKitLearn" and click on "Add"
-
The XLKitLearn icon should appear on the "Home" tab in the ribbon. Click on it. If the XLKitLearn pane opens up as in the screenshot below, you're done!
- If nothing so far has worked, click on the button below to follow the instructions for "Excel online" Excel Online
Excel for Mac
If the AppSource route above didn't work, follow these instructions to install XLKitLearn on Excel for Mac.
-
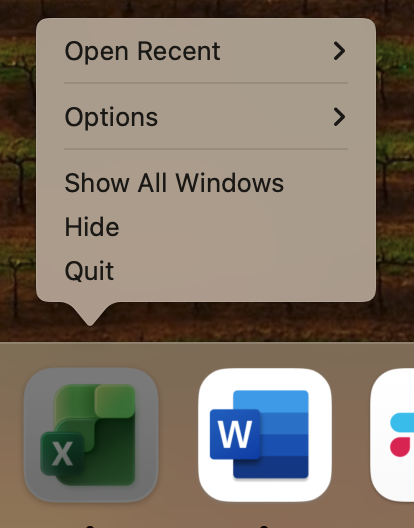
Ensure Excel is completely closed by right-clicking over the Excel icon in your dock, and selecting "Quit"
-
Bring up Spotlight Search by pressing
Command + Space, and type "terminal" in the search bar. Click on "Terminal".
- Click on the button below to copy a line of code onto your clipboard
-
Paste that line of code directly into your terminal, and press enter.
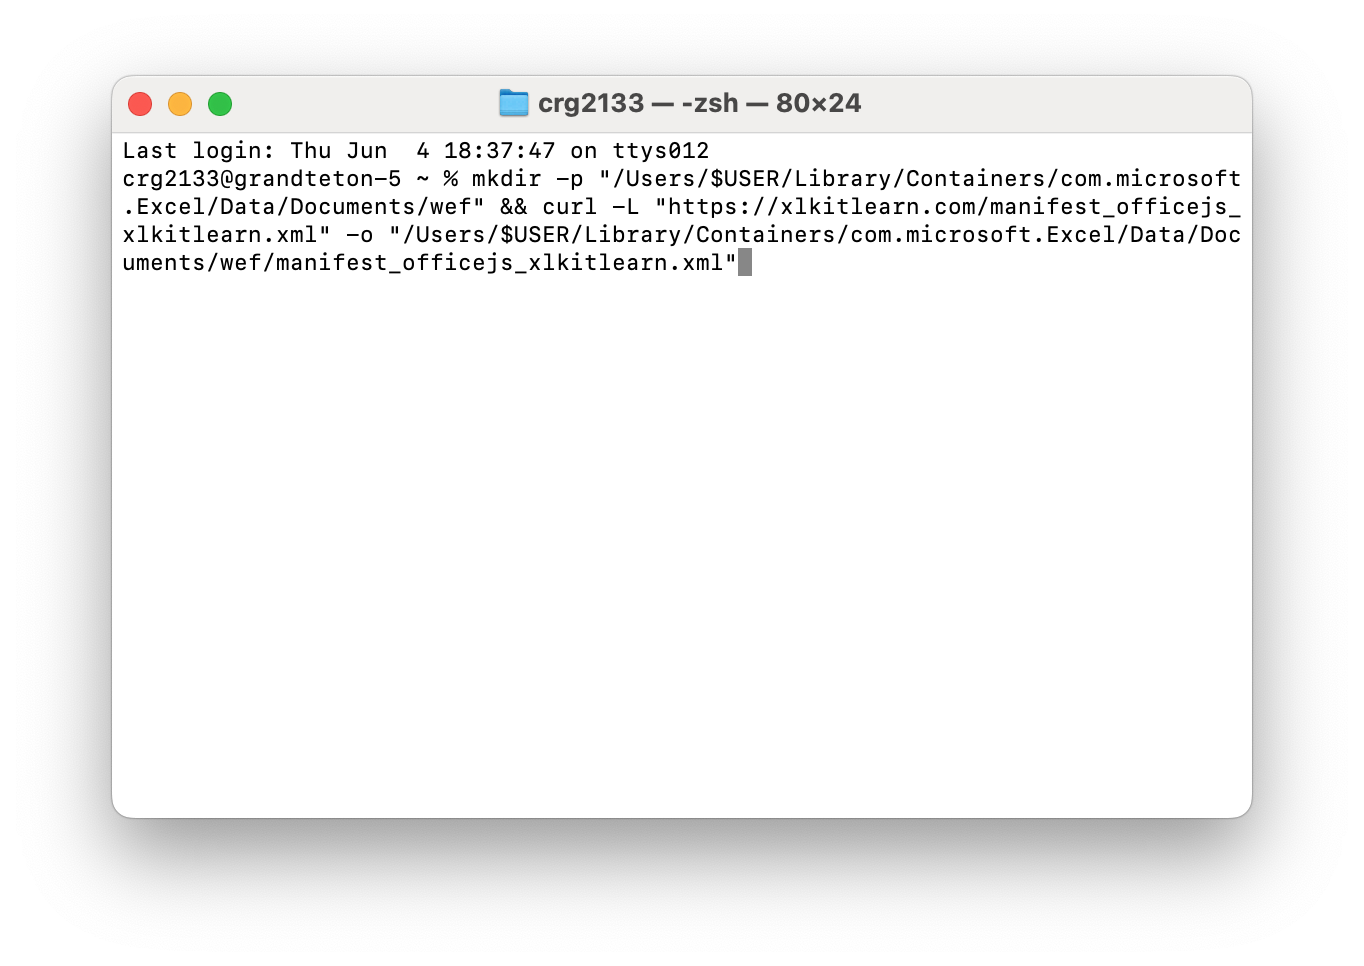
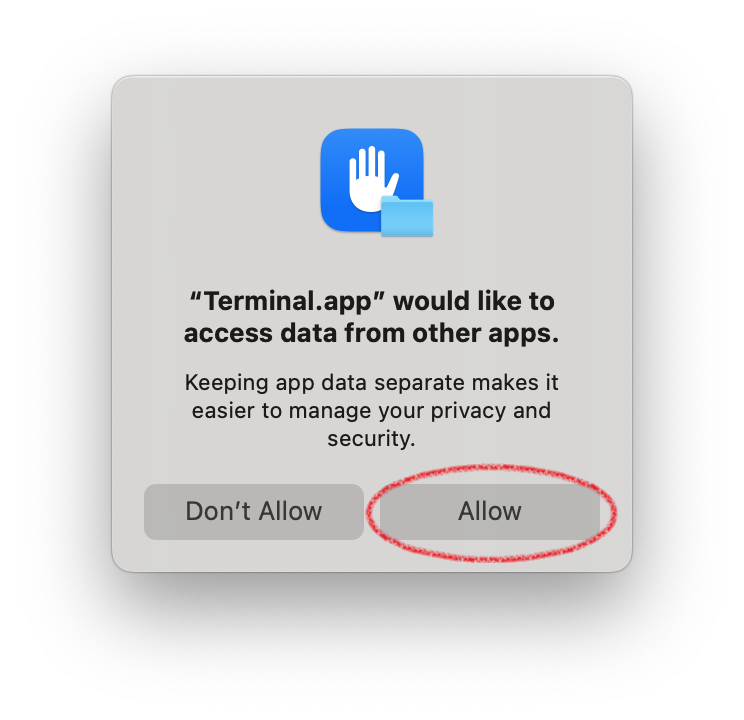
If you see this dialogue, click on "Allow"
 If anyone else ever asks you to paste something into your terminal and press enter do not do it unless you trust them. It is a common method hackers use to introduce malware onto your computer.
 -
Open Excel, and ensure the XLKitLearn icon is visible on the "Home" tab in the ribbon. (You might first need to click on "Add ins" again, and select XLKitLearn which should now appear there). Click on it. If the XLKitLearn pane opens up as in the screenshot below, you're done!
- If nothing so far has worked, click on the button below to follow the instructions for "Excel online" Excel Online
Excel Online
If the AppSource route above didn't work, Excel Online is often the simplest way to install XLKitLearn.
If you have a personal Excel Online account, using your personal email address, return to the instructions at the very top of the page. Personal Excel Online accounts are free, and the AppSource instructions above are guaranteed to work on a personal account.
If you want to install XLKitLearn on an Excel online work account, follow these instructions:
- Click on the button below to download XLKitLearn's installation file. Download installation file
- Go to Excel Online and sign in to your Microsoft account.
- Create a new workbook or open an existing workbook.
-
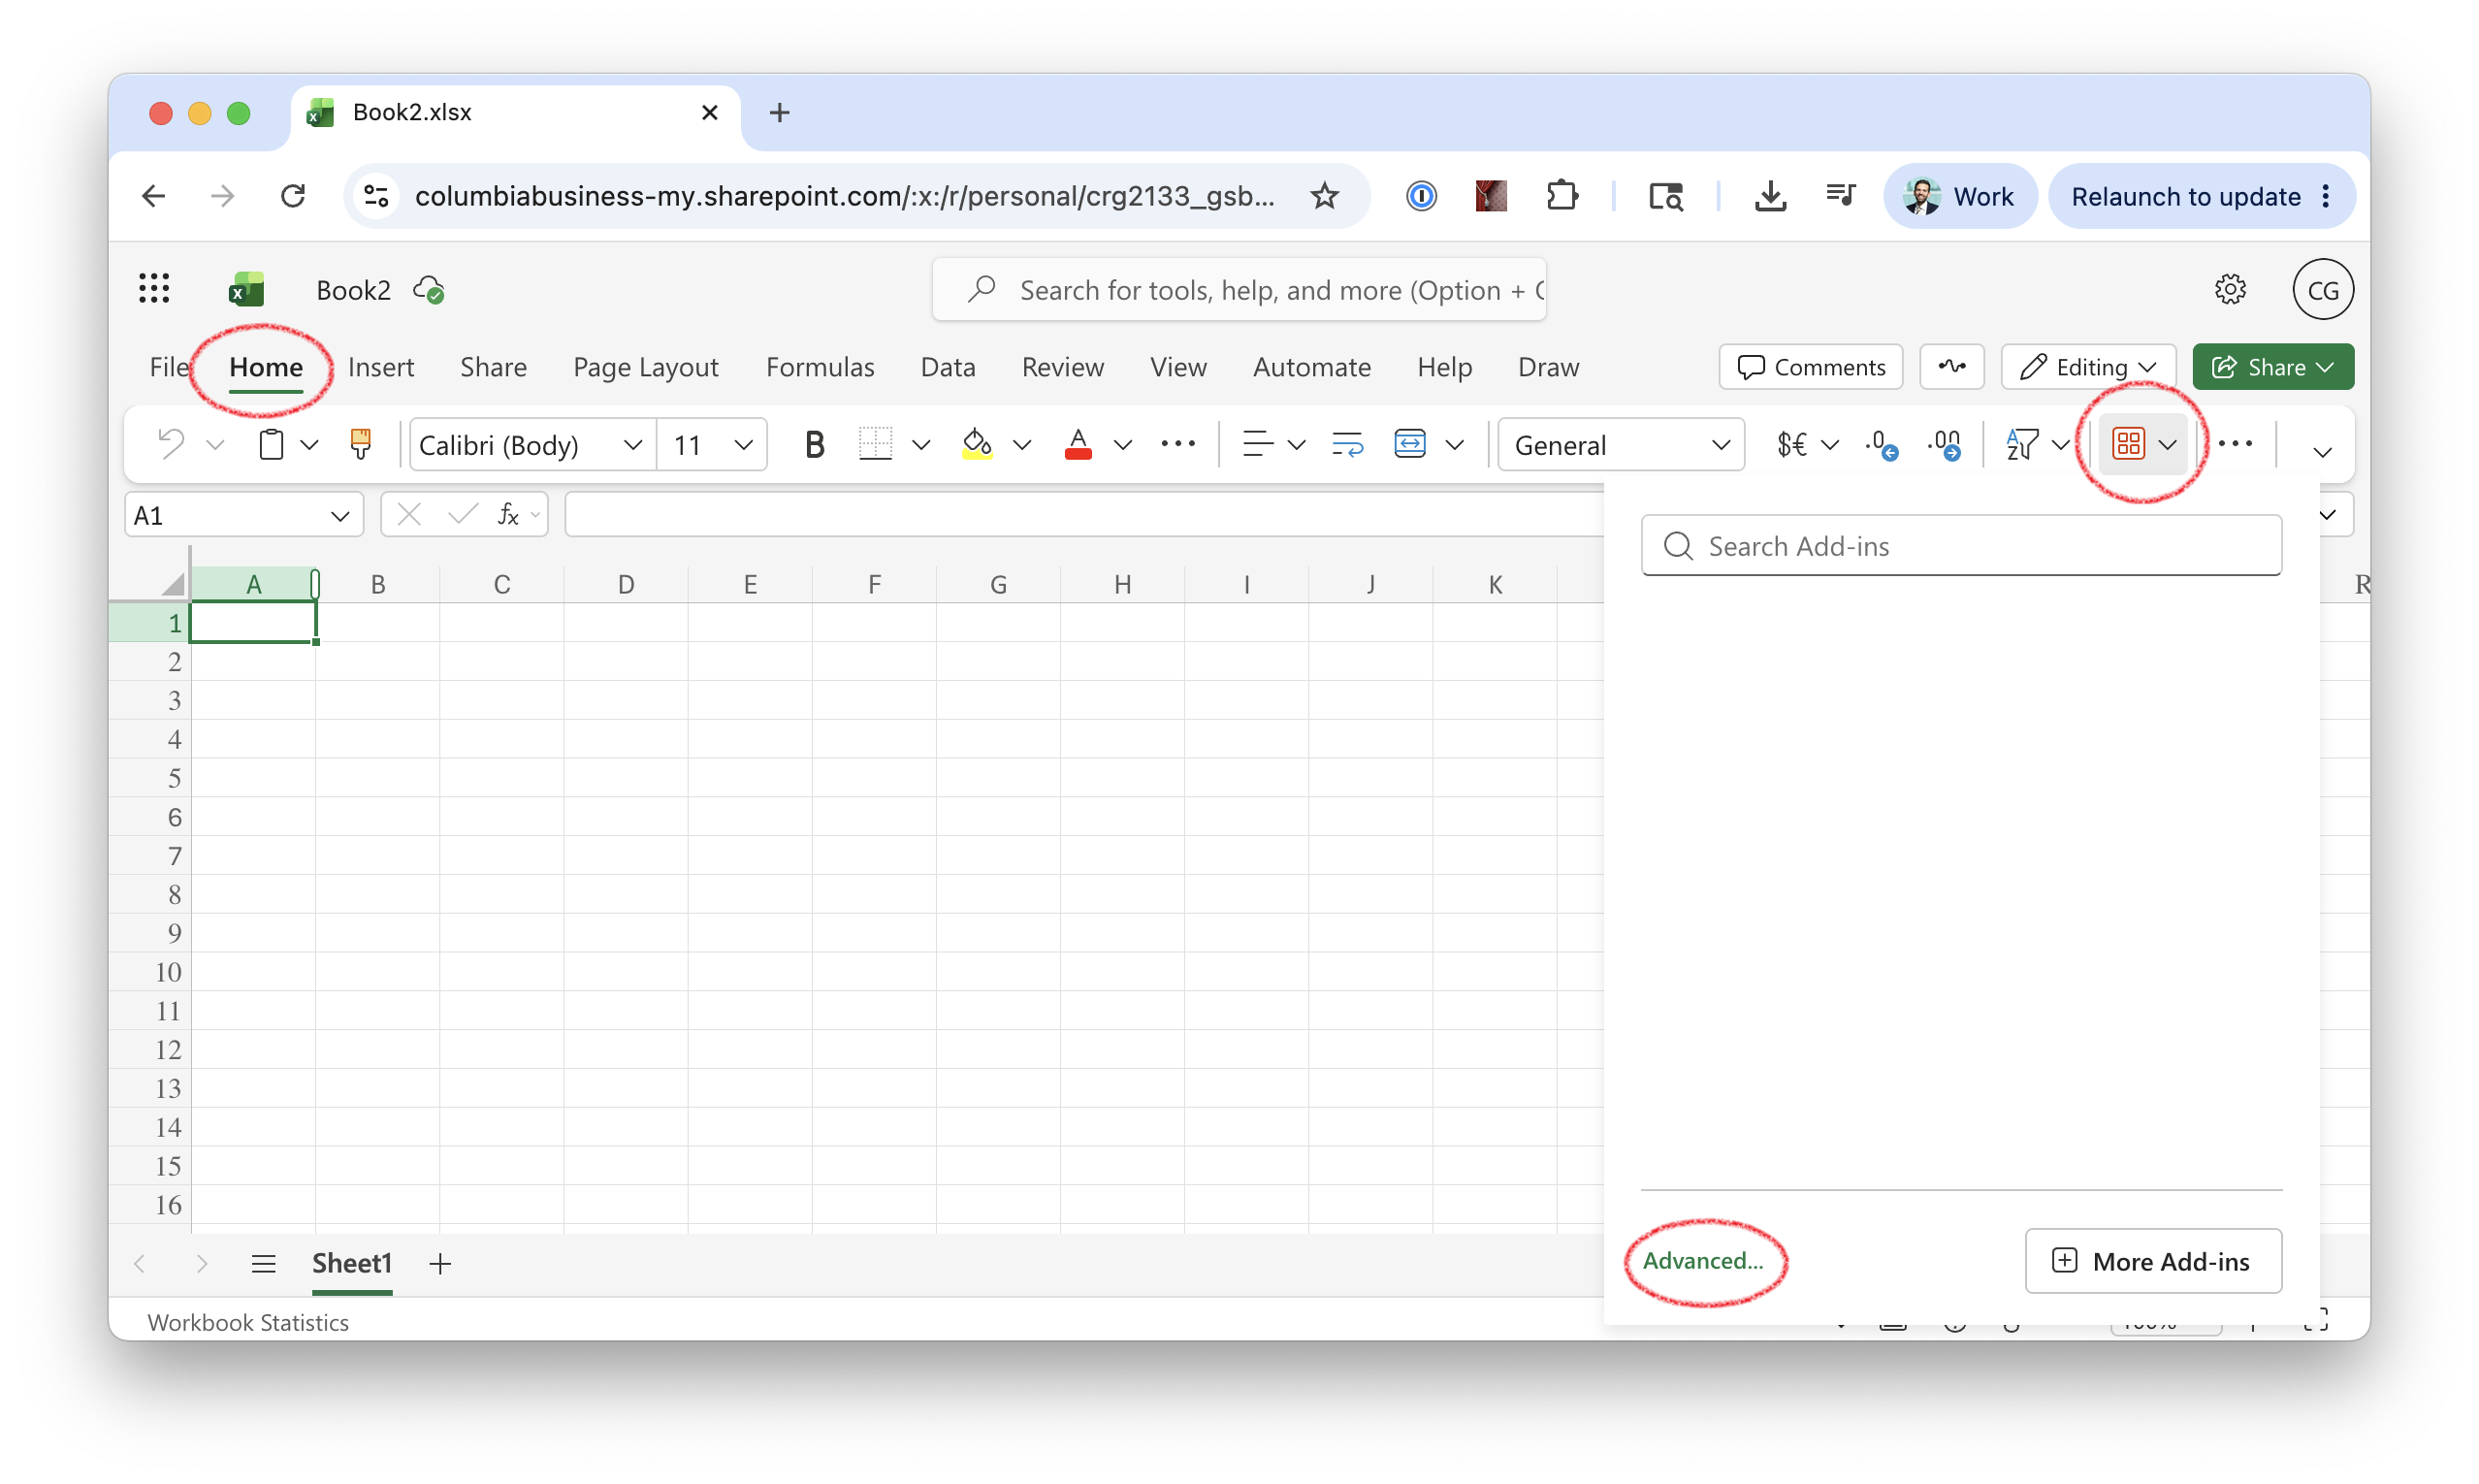
In the "Home" tab, click on the "Add-ins" icon, which looks like four small red squares (you may need to make sure the window is wide enough to see it).
-
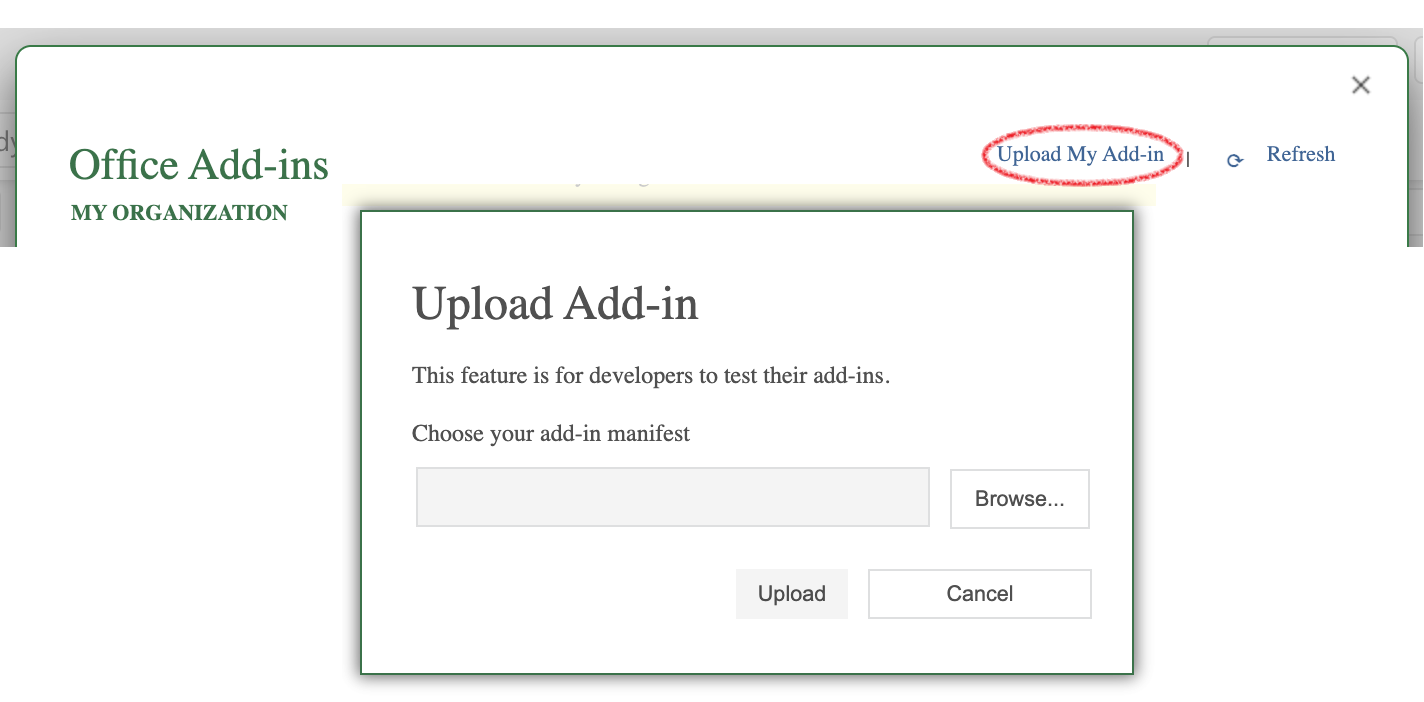
Click on "Upload My Add-in", click on "Browse", and select the file you uploaded above. Click on "Upload".
-
The XLKitLearn icon should appear on the "Home" tab in the ribbon. Click on it. If the XLKitLearn pane opens up as in the screenshot below, you're done!
- If you clear your browser history, you may need to repeat these installation steps.
- If nothing so far has worked, your last resort is to create a new personal Excel Online account, using your personal email address, and return to the instructions at the top of the page. Personal Excel Online accounts are free, and the AppSource instructions above are guaranteed to work on a personal account.